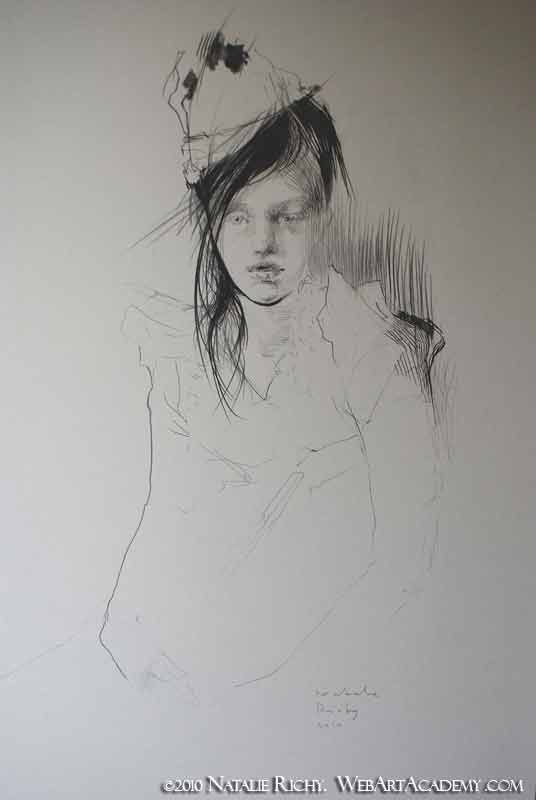
Video Lesson: how to draw a portrait. How to create your drawings fast, impressive and reminding the etching effect.
In this video lesson you will discover how to create very effective artworks with minimal means.
Good quality paper is essential for this kind of artwork. Ideally, paper should be strong enough to take a sharp graphite pencil and it should also be eraser resistant. You can search your art supplies shop for paper that is suitable for drawing, in the required size. Don’t be tempted to replace drawing paper with watercolour or sketching paper, even if you like the surface texture.
Watercolour paper is not as resistant to a rubber eraser as smooth drawing paper is.
We have chosen a 42x 59 cm sheet of paper for a reason. A portrait of the character with a face measuring 9 cm will look good on this size of paper. At this size, you will be able to portray the facial features with a few precise pencil strokes. If the portrait was larger a different technique would be required – a few precise pencil strokes wouldn’t be enough. For a larger portrait the strokes would need to be big and bold.
At least two kinds of pencils are required. The HB pencil will be used for most of the work. Only the darkest places in the portrait will be touched with the B4 pencil.
We are starting with a quick sketch. This is not a portrait of a particular person; it’s a freestyle composition.
This type of artwork can be done in the following way: you come up with an idea for a composition. You make an approximate sketch of it. Then you search for some suitable photos with a face and body position that are similar to your sketch. Now the most interesting part of the drawing begins – by looking at the photos you can improvise and create your own vision of the character. Why should you use these photos? The photos will help you to define the right proportions in the drawing. Use your imagination, adjust facial features, add something new and you will end up with a brand new artwork, one in which no one could find any similarities to the photos you used.
For this artwork, Natalie was using a mirror to draw from life.
Even if you are not drawing a self-portrait, you might still use a mirror to check the anatomical proportions of the face.
As you can see, the main aim of this approach is to depict essential portrait features with minimal pencil hatching, leaving out all unnecessary things. Each stroke in the drawing is treated as an essential part of the drawing. It is quite important to vary the strokes and make each kind of stroke distinct. A variety of strokes are used in the drawing. There are strokes of different lengths, hatching, cross-hatching, parallel hatching, plain lines, and smudging. In some places the hatching is precise and accurate; in other places it is quite freehand and loose.
It is essential to keep the pencil sharpened. We would like each stroke to be noticeable and the right tool will help to achieve that.
Our aim is not to make a realistic portrait, but quite the opposite – we want to express creativity in this drawing. To accomplish that, we are using generalisation and stylisation.
We have started the drawing with delicate strokes depicting the overall dimensions of the head and an indication of the facial features. At this point, the portrait is suggestive, and it will continue to progress in a more freehand style. The whole drawing is quite “sketchy.” The work continues on all parts of the drawing almost simultaneously; we do not concentrate on one particular area at a time. It is advisable to spend a bit more time and effort on drawing the eyes because the viewer will always pay attention to them.
The emotional energy of the drawing will greatly depend on the face’s expression. It’s not enough to draw all the facial features with anatomical correctness. You must also depict the individual character of the person.
At the end we have a great artwork that looks fresh and easy.


This Post Has 0 Comments