Video Lesson: How to draw with sanguine. Sanguine technique.
Part 2
The beginning of this article The technique used is quite laborious, involving small circular or oval strokes with a sanguine pencil.
If you have ever worked in lithography, you may notice that drawing with wax sanguine on the paper and using a lithography pencil on the lithography stone gives the same feeling of the surface. This is because the viscosity of pencils and the circular movements are similar, whether working in wax sanguine or doing lithography.
The circular pencil movements are best suited for when the surface needs to be evenly filled in. The pressure of the sanguine pencil should be varied. The more gentle the pressure, the lighter the result. In the shadow places, more pressure should be applied. Layer by layer, the pencil strokes gradually build up to achieve the desired tonal effect. The various hatching methods may be applied, as well as individual strokes or lines when drawing strong borders between the light and shadow. At the same time, using such strokes can make it quite difficult to maintain the evenness of the tonal surface.
OK, let’s return to our drawing surface. We have chosen a good quality, unevenly tinted thick paper, which is very similar in appearance to natural stone. You can prepare the tinted paper yourself like the old masters used to do.
For example, Holbein, who often used this medium, tinted the paper in most of his portrait drawings, varying the tint frequently, and sometimes using zinc white as a wash. His aim seems to have been to select the few essential features in a head and draw them with great finality and exactness. In many of the drawings the earlier work has been done with a red or black chalk and then rubbed down. Then the drawing was redone with a brush, or some of the chalk rubbed up with water and gum, or a silver-point line of great purity. In other drawings he has tinted the paper with watercolour and rubbed this away, exposing the white paper where he wanted a light area. He also used Chinese white for the same purpose.
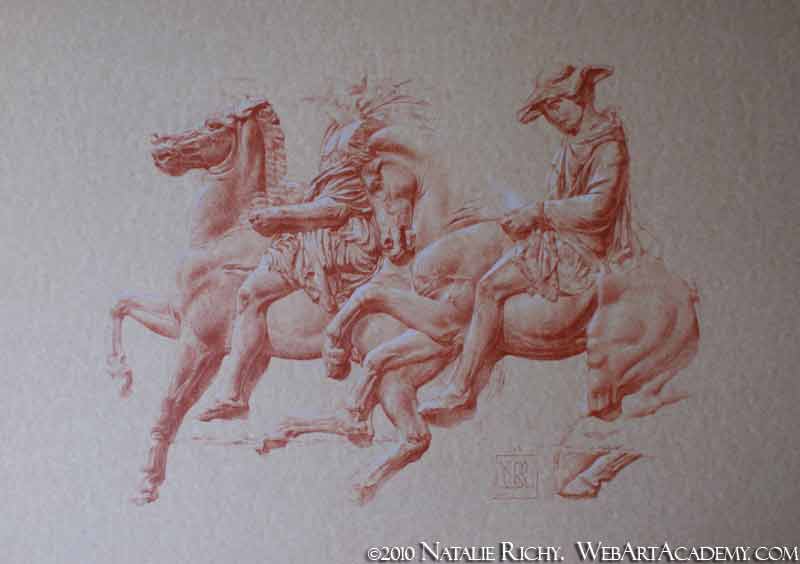
The drawing of sculptural casts was always regarded as the fundamental step in practicing the art of drawing. The best choice, obviously, would be to draw from original sculptures. If you are lucky enough to have museums nearby that display sculptures and reliefs, going to the museum and drawing from life would be the ideal way to train. You may also consider drawing from the cast copies; it is no way less important or less useful than drawing from life. If you have no options other than drawing from photographs of the sculptures or casts, don’t disregard this opportunity. Even making drawings from photos will help you to improve your drawing skills. Usually marbles and casts are white or monochrome, which helps the artist to concentrate on the shape and tonal solutions rather than on colours.
On our light-toned paper the white chalk creates natural highlights. On the darker-toned paper the white chalk will appear in much stronger contrast, standing out from the mid-tones. The white chalk pencil is used for our drawing. This is the same chalk that comes in sticks. Using it in pencil form allows you to sharpen the tip and make more precise white strokes. It is quite important to keep the places for highlights sanguine-free, because white chalk mixed with sanguine will create an unwanted pink-orange tint.
This is the final result of our drawing in sanguine. You will notice how the white chalk freshens up the monochromatic drawing and gives greater contrast to the volumes of shapes.


This Post Has 0 Comments